Monday, 31 July 2017

Waste Material Craft (Matchbox)

Paromita Pramanick

Looking for some creative ideas for your kids. Well here is a solution to your search, where you do not need to step out of your home, and you can teach your child creative stuff at home. Why not we make something out of the things lying at our home itself. Yes! To make the best out of the waste materials.

Reusing and recycling the waste materials with some decorative end product is a great idea which enables the child to learn the importance of not wasting things and also it brings out the artistic creativity of the child. Waste material art and craft teaches us to turn the waste materials into beautiful and innovative home made products. It keeps the child engaged in some learning activities where he is able to enhance his psychological development.

Our primary goal is to reduce the waste management in our society, and since every learning starts from home, why not the first step to reduce the garbage begins from our home itself. Though it would be a small initiative from a small family, if everyone follows it would reduce the wastes in our surroundings, keep it clean and also it will help our child to be more responsible to not throw things, instead use them for more innovative purposes.

In this section, we will make something interesting out of the used Matchboxes lying at our home. Almost all the materials can be found in our homes that we are going to use for this activity. The end product looks fabulously rich and is less expensive, can also be used for good home decoration. This is a very easy activity and kids show a lot of interest and get engrossed while doing it.

We are going to make a ‘Mini-Drawer Dresser’ with the used Matchboxes.
Below is the activity with step by step instructions.

Materials Required:

  1. Match boxes ( used and emptied, 6 Nos.)
  2. Velvet paper / decorative paper / gift wrapping paper (27x10cms rectangular paper cutout)
  3. Drinking straw ( cut into 1cms)
  4. Thread and Needle
  5. Glue
  6. Safety Scissor/ Cutter
Method: 
  1. Arrange all six matchboxes in this form:
    3 boxes on one side and 3 on the other side, one above the other.
  2. Now stick all of the 6 boxes together with glue.
  3. Cut small pieces of the straw to stitch them in front of the boxes with thread and needle.
  4. Remove the inner emptied boxes from the dresser and stitch the straws in front of the boxes with thread and needle (parents can help their little one in stitching. You can also stick some buttons instead)
  5. The handles of the drawer have to be very small yet it has to be sturdy and it should withstand some force when you pull it out. So sticking something with glue will not work. (I’ve used the drinking straws to make the handles).
  6. Cover and stick the upper portion of the dresser with the paper at first
  7. The back of the dresser should be wrapped in a gift wrapping form.
  8. Leave one side uncovered, and stick the paper around the other sides of the dresser.
    this is how it looks after covering with paper
  9. Your tiny little Mini-Drawer is ready to be used. 
    You can store all your favorite tiny things and also it can be used as a toy to be played with your little one.
Kids will love doing this activity, especially the girls who are always fascinated about their dresser as they can store all sorts of accessories such as their tiny earrings, beads, and clips etc.

Recycled crafts are a great idea for kids and are also a valuable tool for entertainment and distracted minds. There are so many eco-friendly recycled art projects that can be made with waste materials, these keep them busy and bring out the best innovative work from them. Get inspired by doing craft works at home and decorate your home.

Reference: m@debylakshmi
Paromita Pramanick ©2017. All Rights Reserved.

Sunday, 9 July 2017

Tilapia Fish Recipe

Paromita Pramanick

There are recipes in every cuisine that are mostly passed on from generations to generations, the kind of recipes that we cannot live without. Some of the recipes undergo a complete transformation over the time, while some remains with their authentic never losing classic taste in them.

Tilapia Fish Recipe is the classic combo from the heart of Bengal cuisine. And there is not a single person who would not love to eat fish and drool at the very sight of it, apart from the ones who are vegetarian for sure. Being from a Bengali family, our lunch or dinner menu does not go without the fish item on the table every week, and that is why we love to have fish in our meals.

I personally like the fish fries, fish gravy and there are varieties of methods to prepare the fish curries in our Bengali cuisine. I like Rui maach, Ilish maach, prawns, pomfret fishes and when it comes to the Tilapia fish I like the way my mom prepare the fish curry, I would share my mom’s recipe also on my blog in the near future.
Here's the Tilapia Fish Recipe with step by step instructions:

[Non-Veg]

Prep Time: 30 minutes
Cooking Time: 20 minutes
Total Time: 50 minutes

Course: Side
Cuisine: Indian/Bengali
Serves: 4

Measuring Items:1 cup=250 ml, teaspoon

Ingredients:
  1. Tilapia fish- 250 grams (4 pieces)
  2. Onion-2
  3. Green Chili- 4
  4. Ginger- ½ inch
  5. Garlic- 6 cloves
  6. Tomato- 2
  7. Coriander leaves (for garnishing)
Spices:
  1. Mustard oil- 1 cup
  2. Turmeric powder- 2 tsp
  3. Mirchi powder- 2 tsp
  4. Coriander powder- 1 ½ tsp
  5. Cumin powder- 1 tsp
  6. Salt (as per the taste)
Method:
  1. Wash the fish pieces properly. Marinade them with turmeric powder (1 tsp) and salt for 30 minutes.
  2. Heat oil in a pan. Fry the fish pieces and keep them aside. (Oil remains in the pan, so no need to add more oil into the pan)
  3. Add finely chopped onions, fry till golden brown.
  4. Now add ginger- garlic paste, green chilies and chopped tomatoes. Simmer for 2 minutes.
  5. Add the remaining spices. Mix them well. Cover the pan with the lid and simmer for 2 minutes. 
  6. Add ½ cup water. Cook for 5 minutes. Then add the fried fishes in  the pan.
  7. Garnish with chopped coriander leaves. Serve hot with rice.
This Tilapia Fish Recipe is one of the combined version from the traditional lip smacking fish curry from Bengal. Enjoy this classic Tilapia Fish Recipe with hot steamed rice. Enjoy cooking, serving and eating!!

Paromita Pramanick ©2017. All Rights Reserved.

Spray Painting on Paper

Paromita Pramanick

Painting is an Art. Love for painting comes from the person who understands the importance of Art. Basically when we are kids we just draw or scribble around, but as we grow up, our understanding and imagination power increases and instead of just putting the colors on paper, we transform the colors into a beautiful painting. As a kid, we usually begin to explore things in and around us, then learning from our surroundings bring out our talents and specialties into our hobbies.

People all over the world try their hands in painting, they show interest in Art. But few may get excelled in painting, so there is an activity for them called the ‘Spray Painting’ that could be helpful to those who are still not given upon their interest. This painting allows them to express their creativity, imaginative, stimulative and developing skills. It is not only an activity for the children, but even the grown ups can possess their interest in this painting.

Children love Spray Painting for many reasons:
  1. It is a fun-filled activity without any boundaries.
  2. Children do the painting independently.
  3. They love the spread of the colors which is eye-catching.
  4. They find their freedom and express happiness while doing the activity.
  5. They are not forced to limit their use of colors.
  6. They can sprinkle the color anywhere on the surface provided to them. 
  7. This activity is inexpensive and not too messy.
  8. It is very easy and precise for the young group.
Spray Painting
There are varieties of Spray Painting for children such as:
  • The outdoor Spray Painting- where children are allowed to spread the colors on a big platform or sheet.
  • Object Spray Painting- where we usually select an object like leaves of a plant, stencils, shape cut-outs etc. we keep the object on a sheet of paper and spray color, after the color coats thoroughly and dries, we lift the object from the paper where it will leave an impression.
  • Tape Spray Painting: in this activity, we put a tape on the desired paper or surface, then children randomly choose their own colors and spray the paint on the surface. Then we remove the tape from the surface and you will get the texture on the paper.
In this session of the Spray Painting, we are going to prepare a stencil ie, patterns cut-outs in a piece of paper. We are using a very simple tool for this activity ie, a used toothbrush, therefore here you need not have to spend much money on any articles. This activity is not messy, however, in preschools, we usually give our children to wear a painting smock or apron. The toddlers love to do this activity with the toothbrush.

For this Spray Painting, I’ve used acrylic colors adding water to make the paint thinner. You can also use Tempera or Poster colors and make sure to add the proper ratio of water with the paint to make the fluid flow. I would recommend using non-toxic and washable paint for this Spray Painting.
Materials Required:
  1. A4 sheet of paper/ A Chart Paper (2 pieces)
  2. A toothbrush (any old used toothbrush will do)
  3. Poster colors/ Acrylic color/ Tempera paint/ washable liquid watercolor
  4. Pencil
  5. Scissor
The procedure to make the Stencil:
  1. Take a sheet of paper (A4 sheet or a piece of old newspaper will also do)
  2. Draw the designs or patterns on the paper with a pencil (I’ve made a drawing of a shoe flower)
  3. Slowly cut the inner wards of the designs using a safety scissor.
This is the outcome of the stencil I got

It is always safe to first test on a sample paper before you create a messy painting, so lets move on to the procedure.

Procedure:
  1. Firstly keep the unused A4 sheet of paper on the floor (or where you want to do the activity, it should be a flat surface)
  2. Put the prepared Stencil upon the paper and move your hands slowly (so that the papers should not move from their position)
  3. Dip the toothbrush in the paint and hold it as shown in the pic.
  4. Hold the toothbrush with the paint on its bristles over the paper, gently run your thumb along the bristles so the spray falls on the paper. To get brighter color spots, hold the brush close to the paper for finer lines of a spray of colors around the shape cut-outs.
  5. Sprinkle the bristles of the toothbrush with your thumb on the complete paper. Then leave it to dry for 10 minutes.
  6. Remove the stencil paper. Now the colors will leave the impression of the shape cutouts on the chart paper and the stencil may look like shown below.
You can paint whatever you want to paint this way. This Spray Painting is the best way to enrich children as they explore. Create your own Spray Painting on paper and share your experience with me on this page.

The below is a Spray Painting activity done by a student from the same sheet of the stencil that I prepared.

Paromita Pramanick ©2017. All Rights Reserved.

Saturday, 8 July 2017

The Peacock and the Crane

Paromita Pramanick
The Peacock and the Crane

(The Peacock and the Crane is one of the famous Aesop’s Fables. A “fable” is known for the short stories, typically with animals as characters, telling a moral or lesson. However, this story ‘The Peacock and the Crane’  is an elongated story as compared to its real version of the fable, this is because for the better understanding of the children. This will help them to know more words, improve vocabulary and listening skills. Basically, this extended version of the story is for the children ageing between 4 to 6 years when storytelling is considered as cognitive skills and language development).

Once upon a time, there was a Peacock and a Crane, who lived in a jungle. Since they lived in the same place, they were good friends for quite a long time. They never fought with each other and they would sometimes barely talk to each other.

The Peacock would everyday walk to the banks of a river in the jungle. He would look on the river where his reflection would fall and often praise for his own beauty. He would boast about his beautiful feathers and say to himself, “Oh! What a beautiful bird I am! Look at my colorful tail”.

The Peacock felt majestic for its beautiful feathers and he would always feel pride to show up his feathers. He would always look at his feathers and admire it. He was very proud of his beauty.

Just then the Crane was passing from the banks of the river. The Peacock came across the crane and started mocking him by saying that the crane is so ugly, his tails are so colorless, whereas the peacock’s tails are gorgeous and look very beautiful like the rainbow.

The Peacock puffed up with vanity, boasted and spread his gorgeous tail in the sun and ridiculed the ashen hue of the crane’s plumage. The Peacock and the Crane began to talk and started having arguments.

Paromita Pramanick
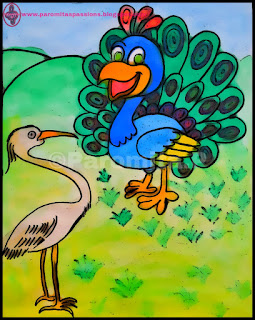
Peacock 
The Peacock sneered and said, “Look at my beautiful tail, what have you got to compare with this? I am dressed in all the glory of the rainbow. I am draped like a king, in gold and purple. My feathers have fine colors and they shine in all the colors under the sun. What a colorless bird you are! You have no beautiful and colorful feathers like mine. I feel so sorry for you, for you have so dull and pale feathers, and your feathers are grey as the dust!”

The Crane agreed and instantly replied that his feathers are not beautiful as the peacock, but it helps him to fly up high above the ground from where he can see the beauty of nature from the sky whereas the peacock can’t do this.

Paromita Pramanick
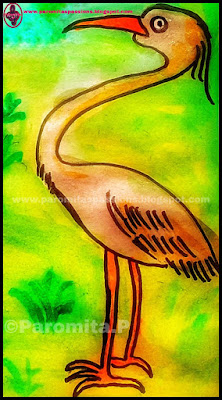
Crane 
The Crane answered, “Well that’s true, of course, I don’t have beautiful feathers, your looks are brighter than mine, but I can fly high up into the sky, all you can do is to gait about on the ground. I soar to the heights of heaven and lift up my voice to the universe, while you walk on earth, like a cock, among the birds of the dunghill. I can fly high above, among the clouds and the stars and I can see all the beauty of the earth in all its glory, while you live down here just like any other animals. My feathers can make me fly across the lake. Can your feathers make you fly?"

There was no reply from the peacock. 

The Crane spread his broad wings and flew up towards the sun, saying, "Follow me if you can!"

But the Peacock stood where he was like any other hefty animals of the barnyard, while the Crane rapidly glided in freedom far up across the clouds into the blue sky.

Paromita Pramanick ©2017. All Rights Reserved.

Thursday, 6 July 2017

Waste Material Craft - Dandiyas


‘Dandiya Raas’
Dandiyas are the traditional dancing sticks mainly used in the traditional folk dance form of ‘Dandiya Raas’ or ‘Raas Garba’ or it is even known to be called as only ‘Garba’ or ‘Raas’. This Garba dance form is basically from the state of Gujarat and Rajasthan in India. The Garba is a dance form played by making circles where both men and women take part. Men and women, boys and girls or sometimes even the children participate in this enthusiastic Dandiya dance, they make a pair for themselves and hit the dandiya sticks with their partners and dance to the tune of the music. The songs are generally played in Gujarati because only this language has the best of all the Garba songs.

‘Garba’ dance is normally performed during the festivals of ‘Navratri’ or ‘Dussehra’ for 9 days continuously. People in Gujarat are usually awake even after the midnights to perform the dance in groups and also enjoy the festive mood. This dance is even performed in other parts of the country and also it is widely famous all over the world. It is even performed in the schools for the Annual Day function or for any kind of such celebration.

‘Dandiya Sticks’
The Dandiya sticks are normally made up of woods, so while playing the Dandiya dance it is very necessary to be careful so that you don’t get hurt from your partner. Therefore the adults can manage their part while playing the Garba Raas, however the children may have a little issue playing with the wooden sticks and of course parents usually keep a close watch when their little ones are playing in the group so that they don’t get hit by someone or even they don’t hit someone. There are Dandiya sticks made of foam wax materials which are child safe.

Apart from the ready-made Dandiyas that we get from the market, how about taking just a few moments to create your own dandiya sticks for the ‘Raas Garba’ at your home. Yes, you can make your own dandiya sticks and for that, you would require just a few rolls of newspapers lying in some corners of your home. These dandiya sticks are actually eco-friendly and have no chemical colors used for its decoration, as it is home- made and very safe for the toddlers.

‘Waste-Material Craft’
Dandiya sticks made with newspaper or dandiya sticks paper craft is a creative activity for all the school going children, especially the preschoolers. In school we teach the children about the importance of folk dances and the use of dandiya sticks, children feel interesting while they learn about the facts and also enjoy the creative work, and they feel very excited as and when they complete creating their art and perform with their own dandiya sticks. So this is a fun loving activity and it also encourages the children to create their own ideas. This is an easy way to make the dandiya sticks at home for you and your kids.

So the whole idea of making these paper dandiya sticks and using them is, they are kid-friendly, eco-friendly, reusable, recyclable, soft sticks, hand-made, waste material artwork, decorative dandiya sticks where children can learn, enhance their creative and imaginative skills. Hence instead making a whole lot of junk of papers at the corners of your home, transform them into something creative and fun activity for the child.

Materials Required:
1.     Newspapers – 12-15 (old ones)
2.     Golden marble paper- 2 (you can also select your own colors)
3.     Glue
4.     Cello tape
5.     Decorative items (lace, satin ribbon, latkan, dori,sequins etc)

Procedure:
  1. Set 7 sheets of newspapers (cut into a 30cms square), layered one above the other.
  2. Apply glue towards the side where you start rolling them. Roll them tightly to form a stick.
  3. Bring each of the ends neatly and stick them along with cello tapes on the whole body of the stick.
  4. Apply glue on the stick’s body and cover the outer layer with a golden marble paper. (can use different colored paper as well)
  5. Use any color tape or decorative laces to wrap your dandiya sticks. Bring the lace around the body of the stick by applying glue on it.
  6. If you wish to make the dandiya sticks more decorative, then wrap latkan at the ends of the stick or wrap a satin ribbon. Make sure to put the cello tape on top of it to keep the latkan in its position.(You can decorate the Dandiya sticks with some more decorative items of your choice).
And there you go, now you are ready to groove on the dance floor with your own Dandiya sticks. Enjoy the Garba Dance!! Navratri is around the corner, so get ready to hit the dance floor with the dandiya sticks dancing to the tunes in the Raas Garba. Go on and dance the night away in this festival.


Paromita Pramanick ©2017. All Rights Reserved.

Honesty is the best Policy

Paromita Pramanick
'Honesty is the best Policy'

(This is a story about a poor milkman, who becomes rich by unfair and dishonest means. He got a lesson through which he learned that ‘Honesty is the best policy’).

In a far-off village, there lived a milkman. The milkman was very poor. His only means of income was by selling the milk he collected from the two cows he had in his backyard. However, the milk was not sufficient enough for him to earn a living of a six-member family. He was the only individual who earned in his family. His family included his wife, his aged parents, and two young daughters.

The milkman used to carry two big cans which could hold an amount of six litres of milk in each. However, he could fill milk of somewhere about only three litres in each can, which he could collect from his cows. He crossed a river every day to go to another city and sell the milk. One day, while crossing the river the milkman thought of a plan so that he could double his earnings. He mixed some amount of water in one of the milk cans and went to sell. He was happy as he was able to earn an extra amount of money by selling the extra litres of milk mixed with water. In this way, every day while crossing the river, the milkman would mix water in both the cans. Therefore, instead of earning three litres of milk for each can, now the milkman earns six litres of milk for both the cans. He continued the same process of mixing water with milk and then selling it to his customers.

The milkman became very wealthy through dishonest means. He crossed the river daily to reach the city where his customers lived. He mixed the water of the river generously with the milk that he sold for a good profit. Very soon he wanted to marry off one of his daughters. Therefore, one day he went around collecting the dues in order to celebrate the wedding of his daughter. With the large amount thus collected he purchased plenty of clothes and gold ornaments from the city. The milkman was very happy to buy everything and with the cheering mood, he happened to cross the river to go back to his village. But while crossing the river his boat got accidentally overturned. And to his misfortune, all his costly purchases were drowned in the river. The milkman was in grief and kept weeping. While he was weeping and watching the river water from the bank of the river, at that time he heard a voice from the river. The voice said, “It is of no use weeping because what you have lost is only the illegitimate gains that you have earned through your customers by fooling them.” The milkman understood his wrongdoing and he was very sorry for his mistake. What he had taken from the river, the river finally took it back from him.

Moral: "You can never gain anything by dishonest means".

Reference: Various.

Find more Stories for Children--

Paromita Pramanick ©2017. All Rights Reserved.

Finger Painting

Paromita Pramanick

Children of all ages love to paint. The painting activity for kids ranges from the simplest painting with a brush or using their own hands. In every childhood education, especially for the preschooler's finger painting is often the very first painting experience children will encounter. Finger painting has many developmental, educational and creative benefits. It is the most Super simple activity for your kids and for all the age groups eventually.

There are many benefits of finger painting for the toddlers and preschoolers aged between 2 to 5 years. Finger painting helps with the child’s fine motor skill development. This activity is a wonderful experience for all the age groups, especially children of all ages. Of course it is quite a bit of messy art activity, however, this activity is sure an exploring adventure for all the kids out there. Children will enjoy doing this activity as and when they dip their fingers in the beautiful colors and slowly when they start to make the patterns with the colors. This activity increases the sensory experiences by seeing and touching the colors, during the growth period of the child it also enhances the observation power as and when they learn different colors and also remember them very well because they felt the colors while they were learning or memorizing the name of the colors.

This finger painting activity is basically done with all the five fingers of our hand and in some cases, we also encourage the children to use both of their hands as it helps the child to broaden their learning process and also they will enjoy doing the painting while they are learning.

A Bouquet:
I have used only the index finger for this particular finger painting, this is a simple basic finger painting of ‘A Bouquet’. This kind of finger painting activity is generally done in the preschools where children are often restricted to follow few disciplines while doing their activity. It is because school is a place where we teach children along with fun, frolic, discipline, adventure, cleanliness, love and care. And of course our parents are also concerned about their child’s health and dress too, so, therefore, we don’t give a lofty activity to the children where they may mess around with all over their body. We usually cover the child with an apron before the start of the activity and also after finishing the activity the children wash their hands properly. Hence this painting is the safest and cleanliest finger painting activity I must assume. Build your child sharpness and concentration with the help of this activity at the centre of your own room without creating any mess around.
Paromita Pramanick

Few benefits that finger painting include are:
  1. It helps the child’s intellectual, cognitive, emotional, senses and tactile development.
  2. It helps to balance with the fine motor skills, which strengthens their hand and fingers.
  3. It enhances their creativity and imagination power.
  4. The child is able to recognize the colors and learn the name of the colors very quickly in the process.
  5. It is a fun loving and encouraging activity.
For this Finger Painting activity the materials required are:
  1. Acrylic/Poster colors (it is necessary to use easily finger washable paints)
  2. A4 sheet paper/ a white art paper of the rectangle shape
  3. Pencil (in case you want to get the drawing done roughly)
  4. An Apron (if necessary)
  5. A handkerchief or a piece of cloth (to wipe your fingers and also if color spills over)
Procedure:
  1. Draw the required figure for the painting in the paper using a pencil.
  2. Dip your index finger into the color of your choice and just put a dot on the paper
  3. Slowly continue doing the process to complete the desired painting.
So let the kids go wild painting their fingers. Finger painting doesn’t have to be a huge mess always. It is actually a fun activity for everyone. Make your own finger paints that also get fun finger painting ideas and activities for your child.

Now there you get the most amazing Finger Painting without much hassle and also it is non-messy. Create your own Finger Painting and share with me on this page for the most beautiful painting experience.

Paromita Pramanick ©2017. All Rights Reserved.